


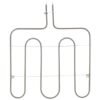
GE BROIL ELEMENT – WB44T10094
$118.33
- Genuine OEM Quality: These parts are manufactured by the same company that made your appliance, ensuring compatibility and performance.
- Perfect Fit: OEM parts are designed to fit your specific appliance model perfectly, reducing the need for modifications or adjustments.
- Optimal Performance: OEM parts deliver the same level of performance and efficiency as the original components, maintaining your appliance’s functionality.
Available on backorder
The GE WB44T10094 UNIT BROIL ASSEMBLY is an easy-to-install replacement part for your oven. It includes a surface element, backing plate, screws and wires to ensure they fit perfectly and securely into your appliance. The broil element produces an even heat distribution across the entire cooking surface to speed meal preparation and is coated to ensure food doesn’t stick to it. This assembly is strong and durable to provide many years of reliable use in the kitchen. It’s a great choice to help bring your oven back to working condition. We’re your #1 source for genuine OEM appliance parts. Contact us for further questions as well as any other appliance parts needs! Step 1: Prepare to Replace the GE WB44T10094 Unit Broil Assembly
Start by gathering the appropriate tools and materials you need to replace the broil assembly. You will need a screwdriver, GE WB44T10094 Unit Broil Assembly, and food-safe gloves.
Step 2: Remove the Old Broil Assembly
Put on food-safe gloves before beginning. Now locate the screws holding the old broil assembly in place. Use a screwdriver to remove these screws and set them aside. Carefully pull out the old broil assembly.
Step 3: Install the New Broil Assembly
Take the new GE WB44T10094 Unit Broil Assembly and place it into the same spot you removed the old one from. Make sure it fits snugly into place. Secure it by inserting the screws removed from step two.
Step 4: Check for Proper Alignment
Make sure the new broil assembly is properly aligned. Check that the hinges move freely and the connection points are secured properly.
Step 5: Clean Up
Discard the old broil assembly in a safe and responsible manner. Remove the food-safe gloves and throw them away. Wipe down the area around the new broil assembly to remove any debris or dust.
Step 6: Test the New Broil Assembly
Turn on the oven and perform a basic test to make sure the new broil assembly is working properly. If everything looks good, you’re done! Your GE WB44T10094 Unit Broil Assembly has been replaced.
Please keep in mind, these instructions are for general guidance and should always be used in conjunction with the manufacturer’s manual, if available. Search EER4000N01BB EER4000N01WW EER4001N01SS EER4001N02SS JB3000R1BB JB3000R1WW JB3000R2BB JB3000R2WW JB3000R3BB JB3000R3WW JB3001R1SS JB3001R2SS JB3001R3SS JB400DP1BB JB400DP1WW JB400DP2BB JB400DP2WW JB400DP3BB JB400DP3WW JB400DP4BB JB400DP4WW JB400DP5BB JB400DP5WW JB400DP6BB JB400DP6WW JB400SP1SS JB400SP2SS JB400SP3SS JB400SP4SS JB400SP5SS JB400SP6SS JB400SP7SS JB400SP8SS JB640DIR1WW JB640DIR2WW JB640DIR3WW JB640DIR4BB JB640DIR4WW JB640DIR5BB JB640DIR5WW 1 2 3 4 5
Only logged in customers who have purchased this product may leave a review.

Reviews
There are no reviews yet.