


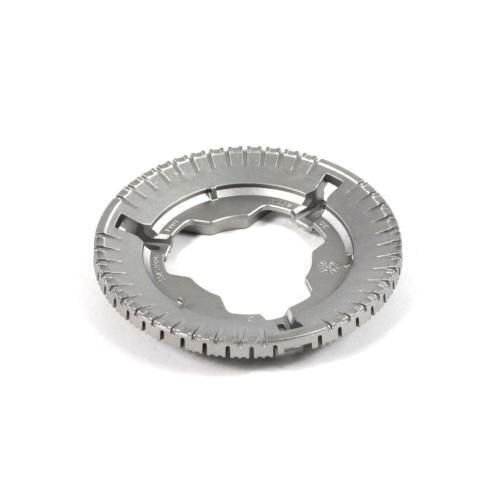
GE SURFACE BURNER BASE – WB16X28764
$28.38
- Genuine OEM Quality: These parts are manufactured by the same company that made your appliance, ensuring compatibility and performance.
- Perfect Fit: OEM parts are designed to fit your specific appliance model perfectly, reducing the need for modifications or adjustments.
- Optimal Performance: OEM parts deliver the same level of performance and efficiency as the original components, maintaining your appliance’s functionality.
Available on backorder
The GE WB16X28764 Head Burner is a top-of-the-line replacement part for most GE range models. The burner head is designed to provide an even heat distribution and an automatic shut off if the flame goes out, giving you the peace of mind that your range is working safely. This durable and reliable burner head has a variety of settings depending on the amount of heat needed, so you can easily adjust the flame size to get perfect results every time. Installation is easy and only requires a few simple steps; no tools are required! Enjoy cooking with confidence knowing that your range is working like new with the GE WB16X28764 Head Burner. We’re your #1 source for genuine OEM appliance parts. Contact us for further questions as well as any other appliance parts needs! Replacing the GE WB16X28764 HEAD BURNER
Step 1: Find a Safe Power Source
Turn off the power to the range by unplugging the power cord or disconnecting the circuit breaker.
Step 2: Remove Range Top
Examine the range top and locate the screws that secure it to the burner box underneath. Use a screwdriver to remove the screws and carefully lift the range top off.
Step 3: Remove any Necessary Brackets and Covers
Look inside the burner box for any brackets that are holding the old burner in place. Use a screwdriver or nut driver to remove them. Also remove any covers that are covering the burner.
Step 4: Disconnect Wires from the Old Burner
Using your needle-nose pliers, carefully remove the wires from their connection points on the old burner. Make a diagram or take pictures to keep track of where each wire connects before you disconnect them.
Step 5: Install the New Head Burner
Once you have the old head burner disconnected, carefully line up the new head burner with the connection points and attach the wires. Make sure all the wires are securely connected and then mount the new head burner into the range top.
Step 6: Reinstall Brackets and Covers
If any brackets or covers were removed in Step 3, reattach them to the range top. Securely tighten all screws to ensure everything is properly mounted.
Step 7: Test the New Head Burner
Turn the power back on and test the new head burner to make sure it is working properly. If the burner is not working, double check to make sure all connections were made properly.
Step 8: Reinstall the Range Top
Once the new head burner is tested and working properly, carefully lower the range top back onto the burner box. Make sure everything is lined up properly and then use the same screws to secure the range top.
You have now successfully replaced the GE WB16X28764 head burner on your range.
Please keep in mind, these instructions are for general guidance and should always be used in conjunction with the manufacturer’s manual, if available. Search CGS700P3M2D1 PGB940SEJ6SS PGB930SEJ6SS CGS995SEL2SS CGS986SEL2SS CGS986SEL1SS CGS986EEL1DS CGS750P4M1W2 CGS750P3M1D1 CGS750P2M2S1 CGS750M2N1S5 PGS930BEL3TS CGS700P2M2S1 CGP95363M1S2 CGP95362M1S2 CGP95362M1S1 CGP95303M1S2 CGP95302M1S2 CGP95302M1S1 C2S995SEL2SS C2S986SEL2SS C2S900P3M1D1 PGS960EEL4ES ZGU36ESL2SS ZGU36ESL1SS ZGU30RSL1SS P2S930SEL4SS P2S930SEL3SS P2S930SEL1SS P2B940SEJ8SS PGS960SEL4SS PGS960FEL3DS PGS960FEL1DS PGS930BEL4TS PGS960EEL2ES PGS960BEL4TS PGS960BEL3TS PGS930SEL4SS PGS930SEL3SS PGS930SEL1SS 1 2 3
Only logged in customers who have purchased this product may leave a review.

Reviews
There are no reviews yet.