


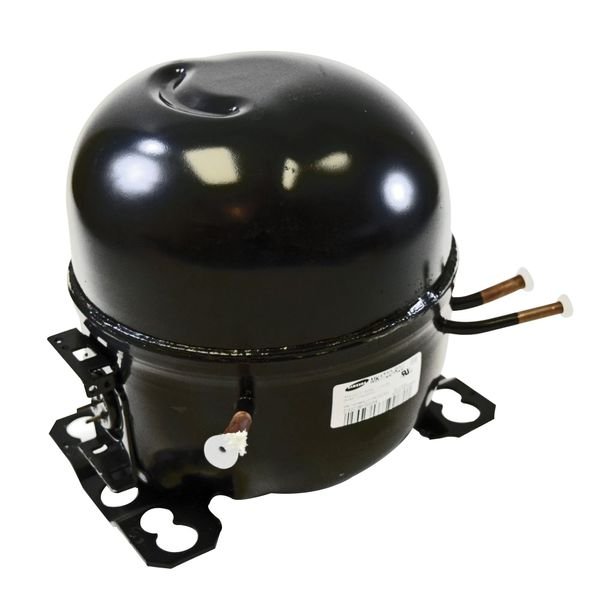
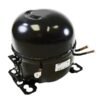
SAMSUNG R-134 REFRIGERATOR COMPRESSOR – MSA162DL1H/ASH
$375.05
- Genuine OEM Quality: These parts are manufactured by the same company that made your appliance, ensuring compatibility and performance.
- Perfect Fit: OEM parts are designed to fit your specific appliance model perfectly, reducing the need for modifications or adjustments.
- Optimal Performance: OEM parts deliver the same level of performance and efficiency as the original components, maintaining your appliance’s functionality.
Available on backorder
Introducing the all new Samsung MSA162DL1H/ASH CMP,COMP,REFRIGERATOR,R-134A! This top-of-the-line refrigerator is perfect for any busy kitchen. It’s equipped with a digital temperature display, adjustable shelves, and a variety of cooling modes that help keep your food fresh and cold—no matter the season. It’s also energy-efficient and features a Dynamic Multi Air Flow System that quickly and evenly distributes cool air to maintain optimal and consistent temperatures throughout the fridge. Plus, its sleek design makes it one of the most stylish fridges on the market. If you’re looking for the ultimate refrigerator for your home, the Samsung MSA162DL1H/ASH CMP,COMP,REFRIGERATOR,R-134A is the perfect choice. We’re your #1 source for genuine OEM appliance parts. Contact us for further questions as well as any other appliance parts needs! DIY Replace Samsung MSA162DL1H/ASH CMP,COMP,REFRIGERATOR,R-134A
Replacing the Samsung MSA162DL1H/ASH CMP,COMP,REFRIGERATOR,R-134A can be an easy task if you have the right tools and follow the right steps. Here are some simple instructions to help you get started on your DIY repair.
1. First, turn off the power supply to your refrigerator and unplug it from the wall outlet.
2. Locate the evaporator coil, and then remove the screws that secure it to the back panel, or use a wrench if necessary.
3. Disconnect the electrical connections from the evaporator and compressor, using care to not damage the wiring.
4. Remove the evaporator and compressor from the refrigerator.
5. Install the new MSA162DL1H/ASH CMP,COMP,REFRIGERATOR,R-134A by connecting it to the appropriate power and refrigerant lines.
6. Secure the replacement unit and ensure that all connections are tight.
7. Reconnect the electrical connections and replace the screws that held the evaporator coil in place.
8. Plug the refrigerator back into the wall outlet, turn on the power and allow it to run for several minutes.
9. Check for any leaks, ensure the seal is tight and there are no loose bolts, and then reset the temperature setting.
10. Enjoy your newly replaced and working refrigerator!
Please keep in mind, these instructions are for general guidance and should always be used in conjunction with the manufacturer’s manual, if available. No more associated models for this part.
Only logged in customers who have purchased this product may leave a review.


Reviews
There are no reviews yet.