


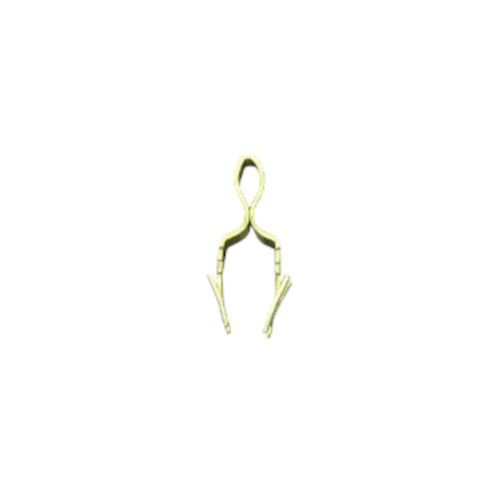
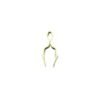
SPEED QUEEN DRYER METAL DOOR STRIKE – D510181
$15.00
- Genuine OEM Quality: These parts are manufactured by the same company that made your appliance, ensuring compatibility and performance.
- Perfect Fit: OEM parts are designed to fit your specific appliance model perfectly, reducing the need for modifications or adjustments.
- Optimal Performance: OEM parts deliver the same level of performance and efficiency as the original components, maintaining your appliance’s functionality.
Available on backorder
Metal door strike works with some Speed Queen, and Amana models of clothes dryers. DIY Replacing the D510181 Speed Queen Dryer Metal Door Strike
Are you experiencing trouble with your Speed Queen dryer? If you notice that the door isn’t closing properly due to a damaged or broken metal door strike, take note — this guide will walk you through replacing it. With a few basic tools and the replacement part, you’ll be back to drying clothes in no time.
Step 1: Disconnect the Power
Before attempting any repairs, make sure to unplug the dryer from its power source or shut off the circuit breaker. This will help ensure your safety throughout the repair process.
Step 2: Take off the Outer Panel
Open the door of your dryer and unscrew the two screws located at the top of the unit’s top panel.
Lift the panel up and remove it, along with the screws. Once the panel is removed, the strike should be visible on the dryer’s frame.
Step 3: Remove the Damaged Strike
The old strike should be easy to remove. It should come off without too much effort. If not, use a combination of pliers and a screwdriver to loosen the screws holding it in place.
Step 4: Replace the Strike
Place the new strike in the appropriate spot. Make sure it is lined up correctly, then secure it in place using the same screws that were holding in the old strike.
Step 5: Reattach the Outer Panel
Replace the outer panel and secure it using the screws you removed earlier. Double-check to make sure everything is secured tightly in order to ensure optimal performance.
Step 6: Test Your Work
Finally, plug the dryer back in and test it out. Open and close the door, and make sure that it is properly secured. If everything checks out, you’re ready to dry another day.
Congratulations! With these easy steps, you’ve successfully replaced your Speed Queen dryer’s metal door strike. With a bit of know-how and some basic tools, you can perform most dryer repairs in your own home. Good luck and happy repairing!
Please keep in mind, these instructions are for general guidance and should always be used in conjunction with the manufacturer’s manual, if available. SearchThe following parts are replaced by this product 510181 Search ADE30RGS171TW01 ADE32FSS431AN01 ADE32FSS431NN22 ADE32FSS541RN01 ADE3LRGS171TW01 ADE3SRGS173CW01 ADE3SRGS173TW01 ADE3SRGS175CW01 ADE3SRGS175CW14 ADE3SRGS175TW01 ADE3TFWS431AW01 ADE3TRGS451LW22 ADE3TRWS431AW01 ADE3TRWS431NW22 ADE3TRWS431NW29 ADE3TRWS461AW01 ADE41FSS171TN01 ADE41FSS171TN03 ADE4BFGS171TW01 ADE4BRGS171TW01 ADE4BRGS171TWAH ADE4BRGS175CW01 ADE4BRGS175CW14 ADE4BRGS175TW01 ADEE8RGS173CW01 ADEE8RGS173TW01 ADEE9BGS173CW01 ADEE9BGS173TW01 ADEE9BGS175CW01 ADEE9BGS175CW14 ADEE9BGS175TW01 ADEE9BSS173CN01 ADEE9BSS173TN01 ADEE9BSS175CN01 ADEE9BSS175CN14 ADEE9BSS175TN01 ADEE9RGS173CW01 ADEE9RGS173TW01 ADEE9RGS175CW01 ADEE9RGS175CW14 1 2 3 4 5
Only logged in customers who have purchased this product may leave a review.
Related products

Reviews
There are no reviews yet.