


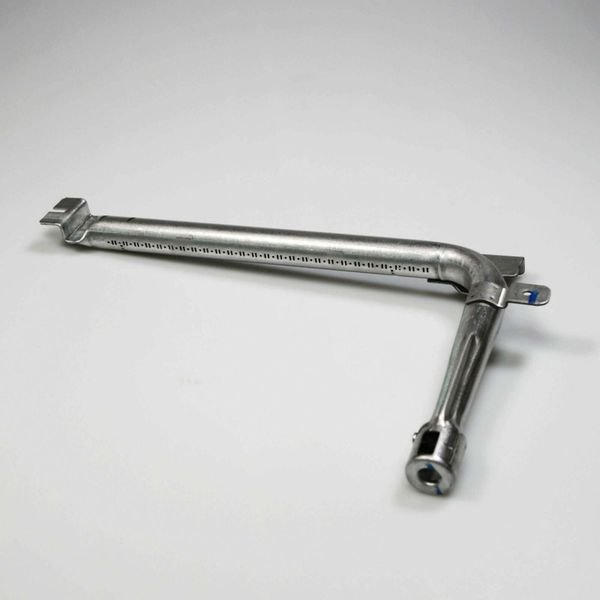
GE BURNER TUBE – WB16T10022
$88.78
- Genuine OEM Quality: These parts are manufactured by the same company that made your appliance, ensuring compatibility and performance.
- Perfect Fit: OEM parts are designed to fit your specific appliance model perfectly, reducing the need for modifications or adjustments.
- Optimal Performance: OEM parts deliver the same level of performance and efficiency as the original components, maintaining your appliance’s functionality.
Available on backorder
This GE WB16T10022 BURNER OVN BAKE ASM is the perfect way to get your oven baking again. This product is an OEM-certified replacement assembly for electric wall ovens, and includes the top and bottom elements, mounting brackets, and hardware. The element wattages are 2600 watt and 1650 watt, so you can be sure your baking and roasting will be complete in no time. Compatible with most electric wall ovens, it’s easy to install and will restore your food preparation back to its original performance. Get your kitchen cooking again with this GE WB16T10022 BURNER OVN BAKE ASM! We’re your #1 source for genuine OEM appliance parts. Contact us for further questions as well as any other appliance parts needs! DIY Guide for Replacing the GE WB16T10022 Burner Oven Bake Assembly
1. Before beginning any repairs on your appliance, be sure to turn off the power to the oven at the circuit breaker.
To do this, locate the switch associated with your oven and flip it to the “off” position.
2. Unplug the oven from the wall outlet and then remove any food that is stored inside.
3. Remove the oven door. To do this, use a screwdriver to remove the two screws located near the hinges at the top of the oven’s door. Once the screws have been removed, pull the oven door away from the oven frame.
4. Next, you need to access the burner oven bake assembly. To do this, you must remove the back panel of the oven. To do so, begin by removing the screws located at the bottom of the panel behind the oven. Once these have been removed, slide the panel off the oven frame.
5. With the back panel removed, you should now have access to the bake assembly. Begin by removing the screws securing the assembly in place. Once the screws have been removed, you can then lift the assembly out of the oven.
6. Take the new bake assembly and place it back into the oven. Secure it in place by replacing the screws.
7. Finally, replace the back panel and secure the panel using the screws at the bottom of the oven.
8. Test the oven bake assembly to make sure it is working correctly.
9. Plug the oven back into the wall outlet and turn on the power at the circuit breaker.
Please keep in mind, these instructions are for general guidance and should always be used in conjunction with the manufacturer’s manual, if available. Search JGS905BEK1BB JGS905BEK2BB JGS905BEK3BB JGS905KEK1CC JGS905KEK2CC JGS905KEK3CC JGS905TEK1WW JGS905TEK2WW JGS905TEK3WW JGS968BEK1BB JGS968BEK2BB JGS968BEK3BB JGS968BEK4BB JGS968BH1BB JGS968BH2BB JGS968BH3BB JGS968BH4BB JGS968BH5BB JGS968BH6BB JGS968KEK1CC JGS968KEK2CC JGS968KEK3CC JGS968KEK4CC JGS968KH1CC JGS968KH2CC JGS968KH3CC JGS968KH4CC JGS968KH5CC JGS968KH6CC JGS968SEK1SS JGS968SEK2SS JGS968SEK3SS JGS968SEK4SS JGS968TEK1WW JGS968TEK2WW JGS968TEK3WW JGS968TEK4WW JGS968TH1WW JGS968TH2WW JGS968TH3WW 1 2 3 4 5
Only logged in customers who have purchased this product may leave a review.
Related products


Reviews
There are no reviews yet.