


GE DISHWASHER TUB TRIM – WD08X20199
$15.00
- Genuine OEM Quality: These parts are manufactured by the same company that made your appliance, ensuring compatibility and performance.
- Perfect Fit: OEM parts are designed to fit your specific appliance model perfectly, reducing the need for modifications or adjustments.
- Optimal Performance: OEM parts deliver the same level of performance and efficiency as the original components, maintaining your appliance’s functionality.
Available on backorder
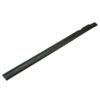
The GE WD08X20199 TRIM TUB is designed for use with certain GE dishwashers. This trim tub allows for an easy and secure connection between the dishwasher and its interior components, providing a secure fit for optimal performance and longevity of use. Constructed with durable plastic, this trim tub is designed to withstand the wear and tear of years of use without sacrificing quality or performance. It features an easy-to-install connection that fits the model of your dishwasher and provides a seamless transition between components. Perfect for replacing a worn or broken trim tub, the GE WD08X20199 TRIM TUB is the perfect solution for extending the life of your dishwasher. We’re your #1 source for genuine OEM appliance parts. Contact us for further questions as well as any other appliance parts needs! Replacing the GE WD08X20199 TRIM TUB: A Step-By-Step Guide
Replacing the trim tub in your GE dishwasher can seem daunting. But with some guidance, this DIY repair job can be done quickly and easily. Follow these steps, and your dishwasher will run smoothly in no time.
1. Unplug the dishwasher: Before doing any repairs to your dishwasher, make sure to unplug your unit from the wall. This prevents the risk of electric shock while you handle the repair.
2. Remove the screws: There will be three screws on the dishwasher’s lower edge. Use a screwdriver to remove these screws.
3. Remove the trim panel: Carefully remove the trim panel on the front of the unit. This should come off easily once the screws have been removed.
4. Access the trim tub: Once the trim panel is removed, you can see the trim tub. It should be visible behind the control panel and may require a bit of maneuvering to access.
5. Disconnect wiring: Underneath the trim tub, the wiring may need to be disconnected. Do this carefully to avoid damaging any wires.
6. Remove the trim tub: With the wiring safely disconnected, you can now remove the trim tub. Make sure to hold the tub firmly when lifting it out, as it can be quite heavy.
7. Replace the trim tub: Place the new trim tub in position and reconnect the wiring. Then, carefully push the tub into place to ensure it is secure.
8. Reattach the trim panel: Screw the trim panel back into place and plug the dishwasher back in.
9. Test the dishwasher: Once the dishwasher has been reassembled, it’s time to test it. Turn the machine on and make sure everything is running properly.
Replacing the GE WD08X20199 TRIM TUB is a simple task that can be completed in a matter of minutes. Armed with the right tools and supplies, you can easily restore your dishwasher to working condition.
Please keep in mind, these instructions are for general guidance and should always be used in conjunction with the manufacturer’s manual, if available. Search CDT835SMJ5DS PDF820SGJ5BB GDT695SSJ5SS GDT695SMJ5ES GDT695SFL5DS PDT825SSJ5SS GDT695SGJ5BB GDT695SBL5TS PDF820SSJ5SS PDT825SGJ5BB CDT835SSJ5SS GDP695SSM5SS GDP695SBM5TS PDT750SSF2SS CDT725SSF2SS GDT740SIF2II CDT765SSF1SS ZDT800SIF1II ZDT800SPF1SS ZDT800SSF1SS PDT750SSF0SS PDT750SSF1SS CDT725SSF4SS GDT720SGF4BB GDT720SSF4SS PDT750SMF1ES GDT720SSF0SS GDT720SGF0BB ZDT800SIF5II ZDT800SPF5SS ZDT800SSF5SS PDT720SSH5SS PDT720SGH6BB PDT720SSH6SS CDT765SSF7SS PDT720SSH7SS PDT720SGH7BB ZDT800SSF7SS CDT725SSF7SS ZDT800SPF7SS 1 2 3
Only logged in customers who have purchased this product may leave a review.
Related products

Reviews
There are no reviews yet.