


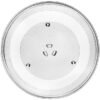
GE MICROWAVE GLASS COOKING TRAY – WB39X10003
$148.67
- Genuine OEM Quality: These parts are manufactured by the same company that made your appliance, ensuring compatibility and performance.
- Perfect Fit: OEM parts are designed to fit your specific appliance model perfectly, reducing the need for modifications or adjustments.
- Optimal Performance: OEM parts deliver the same level of performance and efficiency as the original components, maintaining your appliance’s functionality.
Available on backorder
GE General Electric Hotpoint Sears Kenmore Microwave Glass Cooking Tray WB39X10003We are a Factory Authorized Parts Distributor for General Electric Hotpoint. Trust us for all of your General Electric Hotpoint appliance parts and accessories needs. Replacing the GE WB39X10003 Microwave Glass Cooking Tray
Are you in need of a new microwave glass cooking tray for your GE WB39X10003 Microwave? This guide will provide step-by-step instructions on how to replace the GE WB39X10003 microwave glass cooking tray.
Before getting started, make sure you have all of the necessary tools and supplies for the job. You’ll need a Phillips head screwdriver, some dish soap, a damp cloth, and a new cooking tray that is compatible with your GE microwave model.
Step 1: Unplug the Microwave
To begin, unplug the power cord from the wall outlet to make sure the microwave is completely disconnected from any power source. Be sure to avoid contact with any electrical elements in the process.
Step 2: Remove the Old Cooking Tray
You will need to remove the existing cooking tray before installing the new replacement. Start by using the Philips head screwdriver to remove any screws that are holding the tray in place. Then, gently grasp the tray and pull it straight out of the microwave.
Step 3: Clean the Inside of the Microwave
Next, use a damp cloth with some dish soap to clean off the inside of the microwave where the old cooking tray was located. This will help ensure a clear surface for the new cooking tray.
Step 4: Insert the New Cooking Tray
Once the inside of the microwave is dry and free of debris, you can insert the new cooking tray. Carefully align the tray so that it fits neatly into the compartment. If necessary, you may need to use the Phillips head screwdriver to secure the tray into place.
Step 5: Test the Tray
Now, plug the power cord back into the wall outlet to test if the cooking tray is working. Place a cup of water on the tray and turn on the microwave to make sure the tray is spinning correctly.
Your GE WB39X10003 microwave is now ready to use with its new cooking tray. Following these steps will help you replace the tray safely and quickly.
Please keep in mind, these instructions are for general guidance and should always be used in conjunction with the manufacturer’s manual, if available. Search JVM1441WD002 JVM1410WC002 JVM1430BD001 JVM1430WD001 JVM1440BD001 JVM1440BD002 JVM1440WD001 JVM1440WD002 JVM1441BD001 JVM1441BD002 JVM1441WD001 JVM1410WC001 JVM1450BC001 JVM1450BC002 JVM1450WC001 JVM1450WC002 RVM1435BD001 RVM1435BH001 RVM1435WD001 RVM1435WD002 RVM1435WH001 JES1246BH01 EMO2000C01CC EMO2000C01WW EMO2000C02BB EMO2000C02CC EMO2000C02WW JES1238WH001 JES1238WH002 JES1238WH03 JES1246BH001 JES1246BH002 EMO2000C01BB JES1246BH03 JES1246WH001 JES1246WH002 JES1246WH01 JES1246WH03 JES831WB002 JES831WB01 1 2
Only logged in customers who have purchased this product may leave a review.
Related products

Reviews
There are no reviews yet.