






















Technical
How to Replace a Dryer Heating Element
Nov
How to Replace a Dryer Heating Element (Step-by-Step DIY Guide)
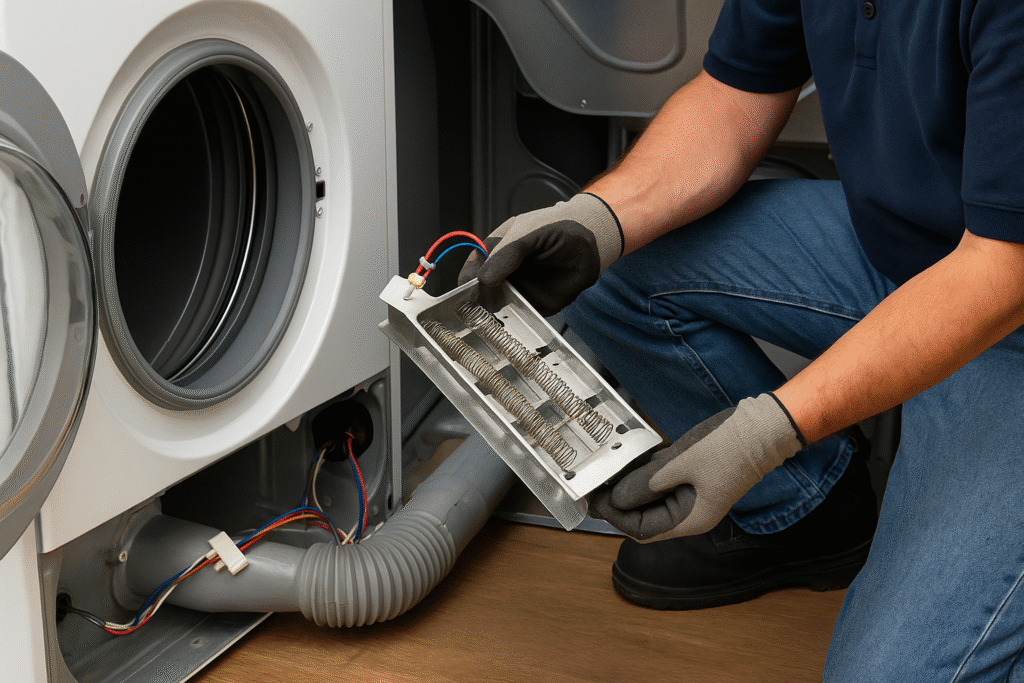
When your dryer stops producing heat, the heating element is often the culprit. This guide shows you exactly how to replace it safely – and how to choose the right OEM or aftermarket part.
What Does the Heating Element Do?
The heating element is the core of your electric dryer’s performance. It converts electricity into heat, which dries your clothes as warm air circulates through the drum. Over time, this element can break or burn out, leading to cold, damp laundry no matter how long you run the cycle.
Symptoms of a Bad Heating Element
- Dryer runs but produces no heat.
- Cycle times are extremely long or clothes come out damp.
- Tripped circuit breaker or burnt smell.
- Heating element continuity test fails (open circuit).
If your dryer tumbles but doesn’t heat – the element is your prime suspect.
Tools & Parts You’ll Need
- Replacement heating element (OEM recommended for best fit)
- Phillips and flathead screwdrivers
- Nut driver set
- Work gloves
- Multimeter (for continuity test)
- Vacuum or brush (to remove lint build-up)
Safety First
Before starting, always:
- Unplug the dryer or switch off the circuit breaker.
- Wear gloves and eye protection.
- Work in a well-lit area with enough space to pull the dryer away from the wall.
⚠️ Never attempt repairs while the dryer is connected to power – even small elements carry high voltage.
Step-by-Step Dryer Heating Element Replacement
1. Access the Back Panel
Unplug your dryer and move it forward for access. Use a screwdriver or nut driver to remove the back panel screws. For front-load dryers, some models require front access through the lower panel instead.
2. Locate the Heating Element Assembly
It’s usually a metal housing near the blower or base. You’ll see wires leading into it from the thermostat and thermal fuse.
3. Disconnect the Wires
Take a photo before removing anything – this will help you reconnect correctly later. Use pliers to gently disconnect the wire terminals from the heating element.
4. Remove the Old Heating Element
Unscrew the mounting brackets and slide the heating element out of its housing. Inspect the coil for visible breaks or burn spots – if you see damage, replacement is needed.
5. Install the New Heating Element
Slide the new element into the housing, align it properly, and tighten the screws. Reconnect all the wires exactly as they were – refer to your earlier photo if needed.
6. Reassemble & Test
Reattach the back panel, plug the dryer back in, and run a short cycle on high heat. You should feel warm air within a minute or two.
Testing the Element with a Multimeter
If you’re unsure whether your old element is truly bad, use a multimeter to test continuity:
- Disconnect power and remove one wire from the element terminal.
- Set your multimeter to the lowest resistance setting (ohms).
- Touch the probes to each terminal – a good element will read between 8–12 ohms.
- If the reading is infinite or zero, the element is burnt out.
Common Causes of Heating Element Failure
- Lint build-up: Restricts airflow, causing overheating.
- Faulty thermostats: Allow excessive heat to damage the element.
- Electrical surges: Can burn the coil instantly.
- Overloaded dryer: Forces element to work harder and run longer cycles.
Clean the lint trap and vent regularly – it’s the easiest way to extend element life.
Choosing the Right Replacement Heating Element
Always match the new part to your dryer’s model number.
- Whirlpool Dryer Heating Elements
- LG Dryer Heating Elements
- Samsung Dryer Heating Elements
- GE Dryer Heating Elements
OEM parts are ideal for durability and fit, but quality aftermarket versions can save 20–40% for older dryers.
OEM vs Aftermarket – Quick Recap
| Feature | OEM | Aftermarket |
|---|---|---|
| Fit | Perfect fit for your brand/model | Usually fits; confirm compatibility |
| Lifespan | 3–5 years typical | 1–3 years typical |
| Cost | Higher | More affordable |
| Warranty | 90–365 days | 30–180 days |
Pro Tips for Better Performance
- Run the dryer empty for 10 minutes after installing the element – this burns off protective oils from manufacturing.
- Clean vents annually to reduce future overheating.
- Don’t overload your dryer; give air room to circulate.
- Replace thermal fuse and thermostat if they test faulty – a bad thermostat can kill a new element fast.
FAQs
Can I replace a dryer heating element myself?
Yes – if you’re comfortable using basic tools and following safety steps. Most replacements take about 45–60 minutes.
How much does a heating element cost?
OEM elements range from $50–$120; aftermarket versions cost $30–$70 depending on brand.
Why did my new element burn out so fast?
Blocked vents or failed thermostats can overheat the element. Always check airflow and sensors before reinstalling.
Can I use a universal heating element?
Only if it’s specifically rated for your model. Universal fits aren’t truly universal – always check compatibility first.
Conclusion
Replacing a dryer heating element is one of the easiest appliance repairs to tackle at home. With the right tools, safe handling, and an exact-fit part, you can restore full heating power in under an hour.
Pro tip: Choose a verified OEM element for long-term reliability or a quality aftermarket replacement for a quick, affordable fix. Either way, RepairPartsZone has you covered with fast U.S. shipping and guaranteed compatibility.
